What is Explorer Patcher?
Explorer Patcher is an application that aims to improve our work environment in Windows 11 and make it more productive by restoring the old Microsoft operating system’s capabilities. The Windows Explorer Patcher will assist us in restoring the Windows taskbar and Windows 10 File Explorer if we need it. To accomplish this, place the a.DLL file in C:/Windows, and all of the files will be downloaded to our PC. The old Windows 10 taskbar, the option to hide the search bar, the All Apps list, and the restoration of the classic power user menu are among the new features brought to Microsoft’s new operating system. It also lets us disable the new Windows context menu and the File Explorer command bar, as well as pick between the Windows 10 and 11 key shortcuts for switching between windows.
Uninstall Explorer Patcher from Windows 11
ExplorerPatcher’s security has also been questioned by users. It is not a virus, and installing it is absolutely risk-free. If you want to uninstall it from your computer, simply follow the instructions below:
1. Using Control Panel
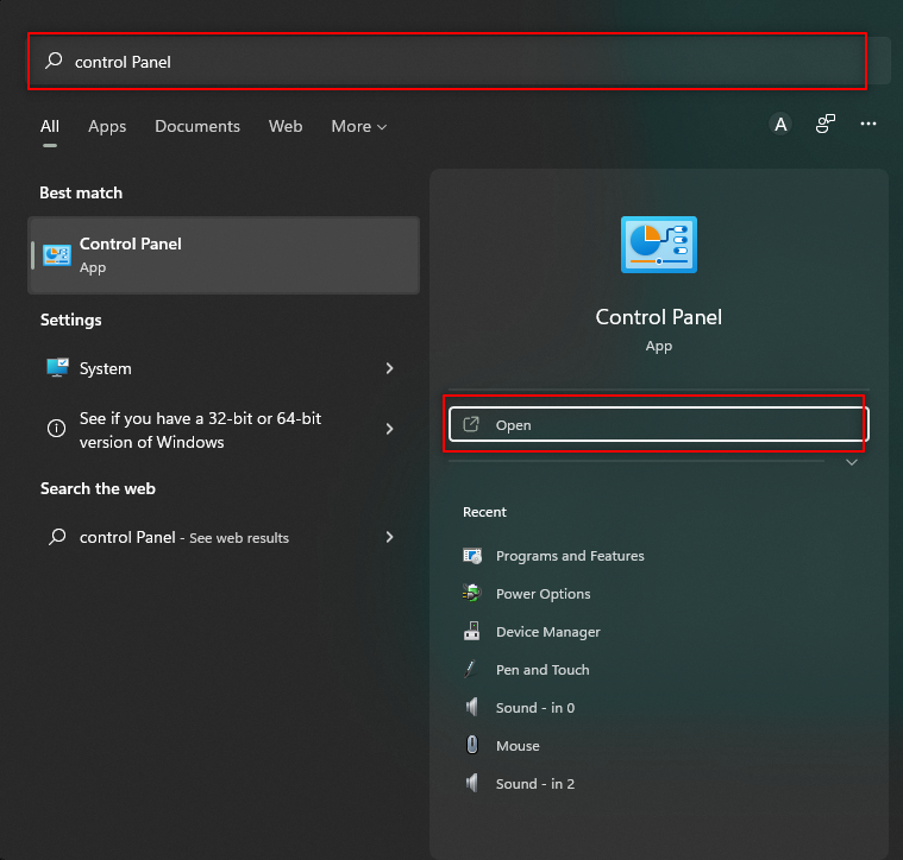
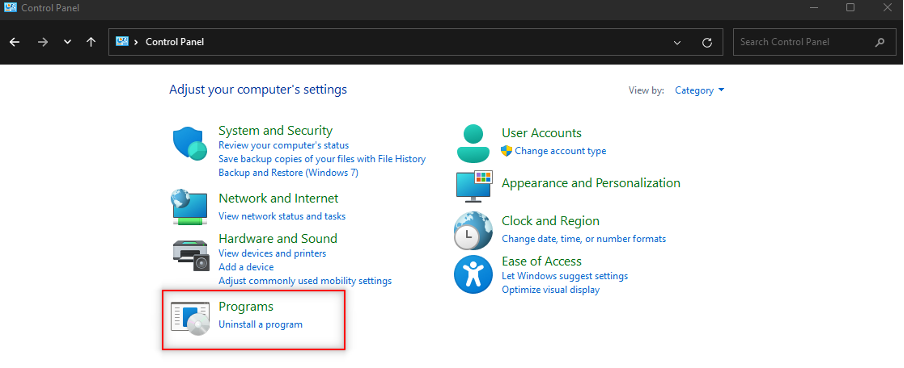
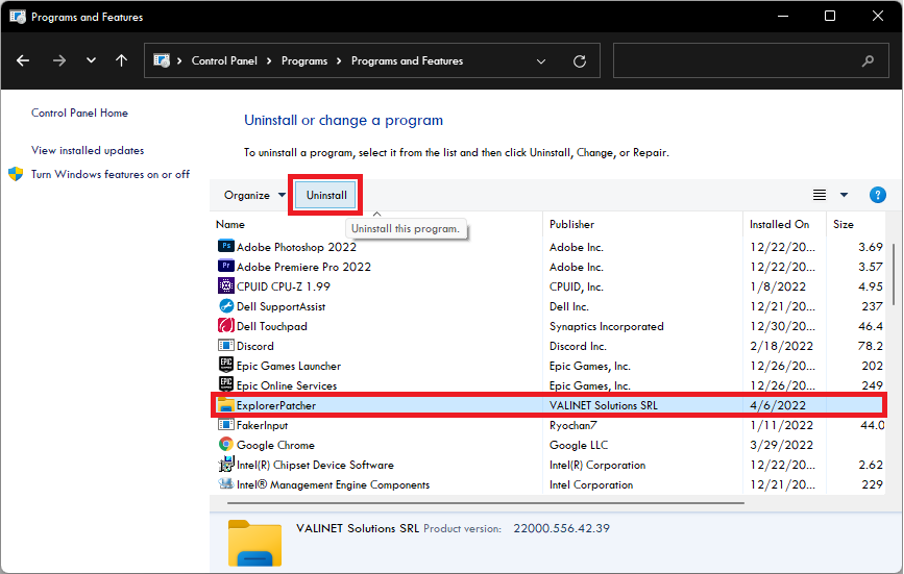
The Explorer Patcher can be uninstalled in the Apps and Features part of the Control Panel, just like any other installed application. Step 1: On your computer, search for “Control Panel” and open it. Step 2: Then, change the View by choice to Category and select Uninstall a Program. Step 3: Then, select Explorer Patcher from the list of installed apps and click Uninstall. Step 4: To finalize the uninstallation, select Yes in the User Account Control Panel. The Explorer Patcher will be uninstalled from your computer, and your taskbar will revert to its default state as it was in the previous Windows version.
2. Using Command Prompt
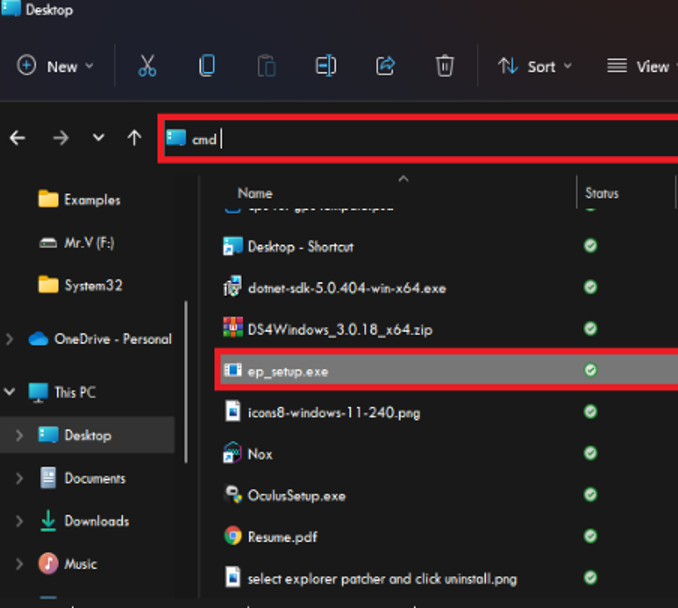
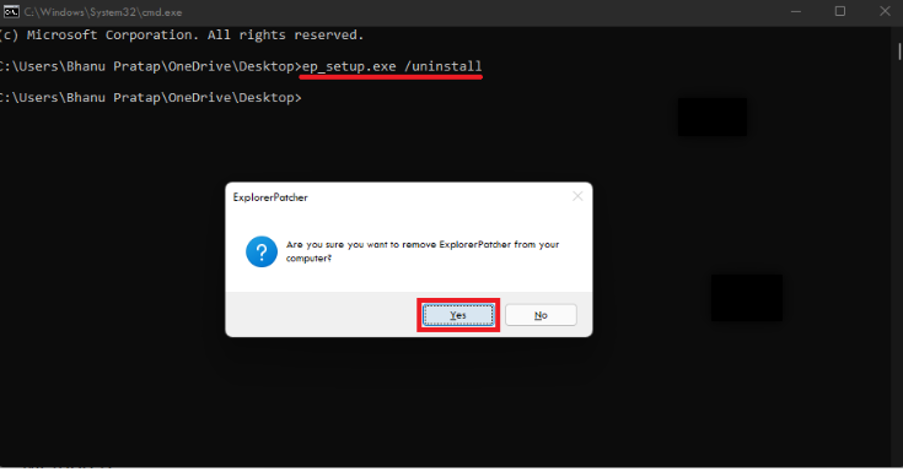
In case you were unable to uninstall Explorer Patcher on Windows 11 through the Control Panel for some reason, you can also try to do so using the Windows Command Prompt. Follow the steps mentioned below: Step 1: Open the File Explorer program on your computer. To open it, press Win + E on your keyboard. Step 2: Then, go to the folder where the Explorer Patcher exe file was downloaded. Step 3: In the address bar of Windows Explorer, type cmd and press Enter. Then, the Command Prompt window will open. Step 4: After that, run the following command: Step 5: Finally, select “Yes” to confirm the uninstallation. Viola! You have finally uninstalled the Explorer Patcher from your computer, and the Taskbar will return to normal.
3. By Renaming The exe File
Here comes another way to remove Explorer Patcher from your computer. This method entails renaming and running the downloaded Explorer Patcher exe file. To uninstall Explorer Patcher on Windows 11, follow the steps outlined below: Step 1: To begin with, go to the downloaded Explorer Patcher exe file and then, right-click on it. Step 2: Then, change the name of the file using the rename option to ep_uninstall.exe. Step 3: Then, after you’ve renamed the file, double-click it to open it. Step 4: Finally, to confirm the uninstallation, select Yes. That is all there is to it. This will uninstall Explorer Patcher on Windows 11.
Final Words
These are the methods for uninstalling the Explorer Patcher from your Windows 11 computer. The uninstalling procedure is straightforward and can be completed through the Apps & Features section of your Control Panel in Windows 11. However, if this method does not work out for some reason, you can definitely try the other two techniques to complete the task.