Also Read: Fix ‘npm command not found’ error in Windows, macOS & Linux
Turn Off Transparency Effects in Windows 11
There are three ways to turn off transparent effects in Windows 11. Two of them involve the settings app. The third one is by editing the registry. I have provided steps for all the three ways below in this article. You can follow the one that feels easier for you.
Using Settings
You can turn off transparency effects in Windows 11 using the Settings app. Microsoft has added the option for it in Personalization and Accessibility settings. The steps are more similar, so you can follow any one of them and easily disable the transparency effects.
From Personalization Settings
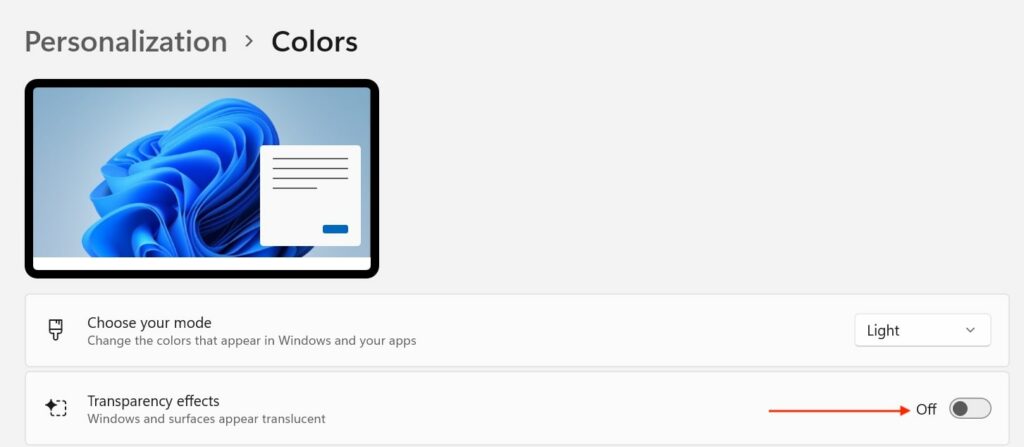
Step 1: Open Settings on your Windows 11 PC. You can do so by pressing the Windows + I keyboard shortcut or by one of the ways explained in this article. Step 2: In the Settings app, tap on Personalization in the Left sidebar. Remember, you will need a valid Windows 11 license key activated on your PC to access the Personalization settings. Step 3: Under Personalization settings, tap on Colors. Step 4: You will find the Transparency effects option on the next screen. It will be On by default. Tap on the toggle to turn off the transparency effects. Once done, Transparency effects are disabled on your Windows 11 PC. You can now close the Settings app and notice the difference.
From Accessibility Settings
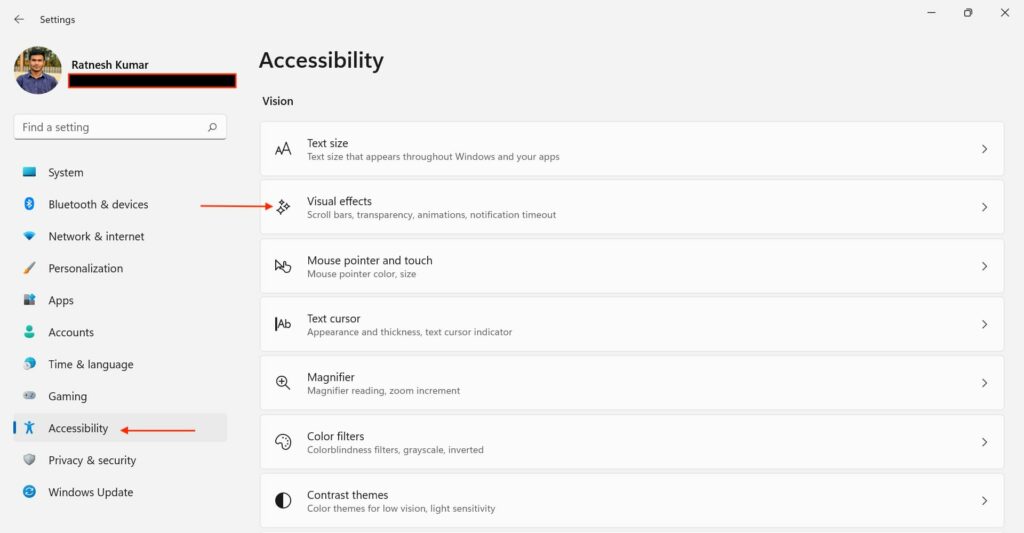
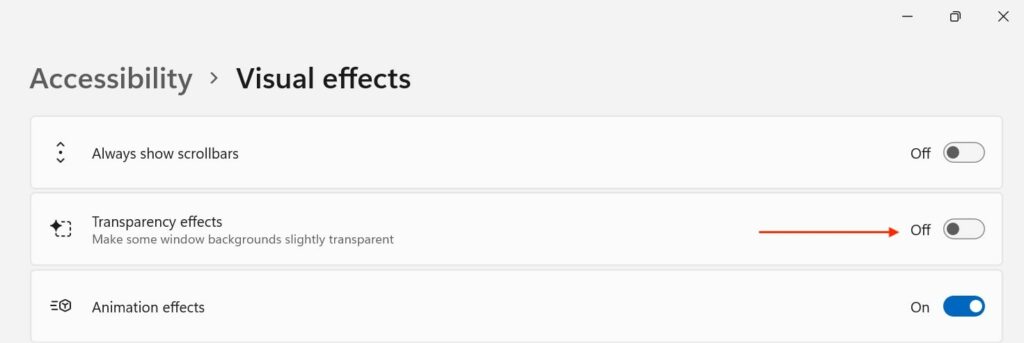
Step 1: Once again, open the Settings app on your PC by pressing the Windows + I keyboard shortcut. Step 2: Under Settings, tap on Accessibility from the left sidebar. Step 3: In Accessibility settings, tap on the Visual effects option. Step 4: You will see the Transparency effects in the turned-on mode on the next screen. Turn off the toggle next to it to disable the transparency effect on your PC. After turning off transparency effects, close the Settings app. Now you will see the acrylic blur that disappears through the whole UI. Also Read: Download iOS 16 wallpapers for iPhone and iPad
Using Registry Editor
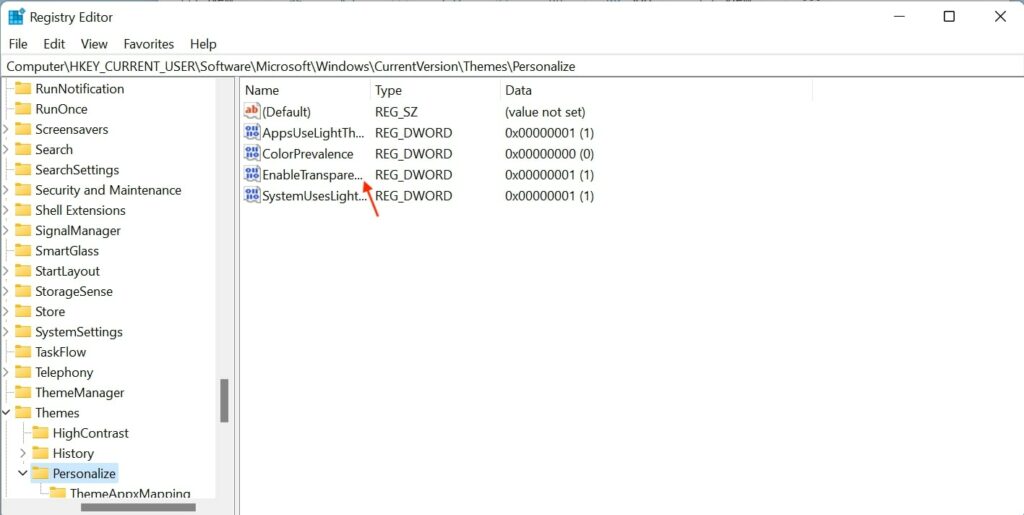
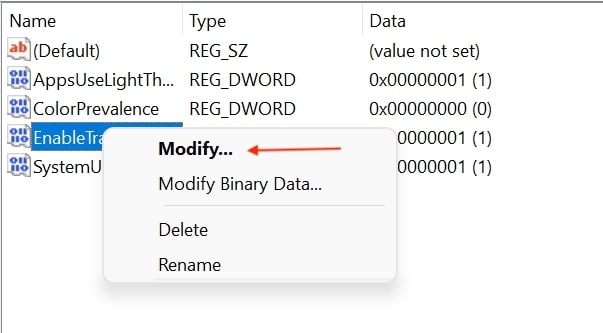
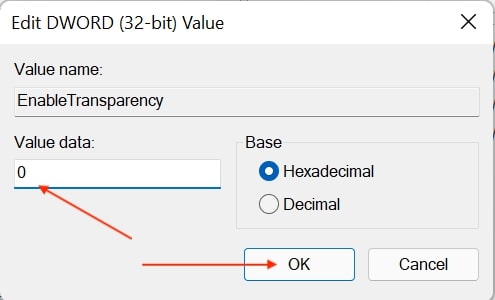
Turning off transparency effects using Settings is easier. You can do it either from Personalization or Accessibility settings. But if you are a Pro Windows user and have used Registry Editor in the past, you can turn off transparency effects using Registry Editor. I have made things simpler for you by providing the step-by-step process below. Step 1: Open Search on your Windows 11 menu. Press the magnifying glass icon right to the Start Menu or press the Windows + S keyboard shortcut. Step 2: In the search bar, type Registry Editor. You will see the Registry Editor app as the best match; tap on it to open. Tap on Yes to allow Registry Editor to make changes on your PC on the next screen. Step 3: Once the Registry Editor app is open on your PC, navigate the below folder. HKEY_CURRENT_USER\Software\Microsoft\Windows\CurrentVersion\Themes\Personalize Step 4: You will find an EnableTransparency key in the personalization folder. If you don’t see it right, click on the personalization folder, select New and then DWORD (32-bit) Value and give it the name EnableTransparency. Step 5: Now, when you have the EnableTransparency folder, right-click on it and tap on Modify. Step 6: By default, the value data will be set as 1. In the Value data box, enter 0 and tap on OK. The value 0 disables the transparency effect, and 1 enables it. After making the changes close the Registry Editor app. You will see the differences across the UI. If you want to enable transparency effects, follow the above steps and enter 1 as the value data for the EnableTransparency key. That’s it; This is how you can turn off Transparency effects in Windows 11 using the registry editor. Does Windows 11 have transparency? Yes, Windows 11 has transparency effects across the UI. You can notice it right from the sign-in screen to Start Menu, Taskbar, Settings, Quick Settings, File Explorer and pretty much everywhere in the UI. How do I turn on transparency in Windows 11? You don’t need anything to turn on transparency in Windows 11 as it comes enabled by default. If you have turned it off earlier and now want to turn it on again, follow the same steps mentioned above in the article and instead of turning it off, turn on transparency in Windows 11.
Final Words
Windows 11 features an excellent transparency effect across the UI. If you have used Windows 10, you are already aware of this effect. It adds a slightly transparent background with an acrylic blur. For most Windows 11 users, transparency effects will be a perfect addition, and they will love it, but at the same time, there are a set of users who might dislike it and want to turn it off. I have made life easier for those users by providing three ways to disable transparency effects in Windows 11. Follow one of the ways and get rid of all the blurriness on your PC.