Like any other Windows feature Zip can occasionally malfunction. In that situation, you need to fix the Zip function on your Windows 11 PC. In this article, we will show you the steps to fix the Zip function not working on Windows 11.
Fix Zip Function Not Working in Windows 11
The Zip function on Windows 11 can stop working for a number of reasons. It can stem from missing system files, outdated drivers, etc. The following fixes should help you to fix this problem.
1. Restart the Computer
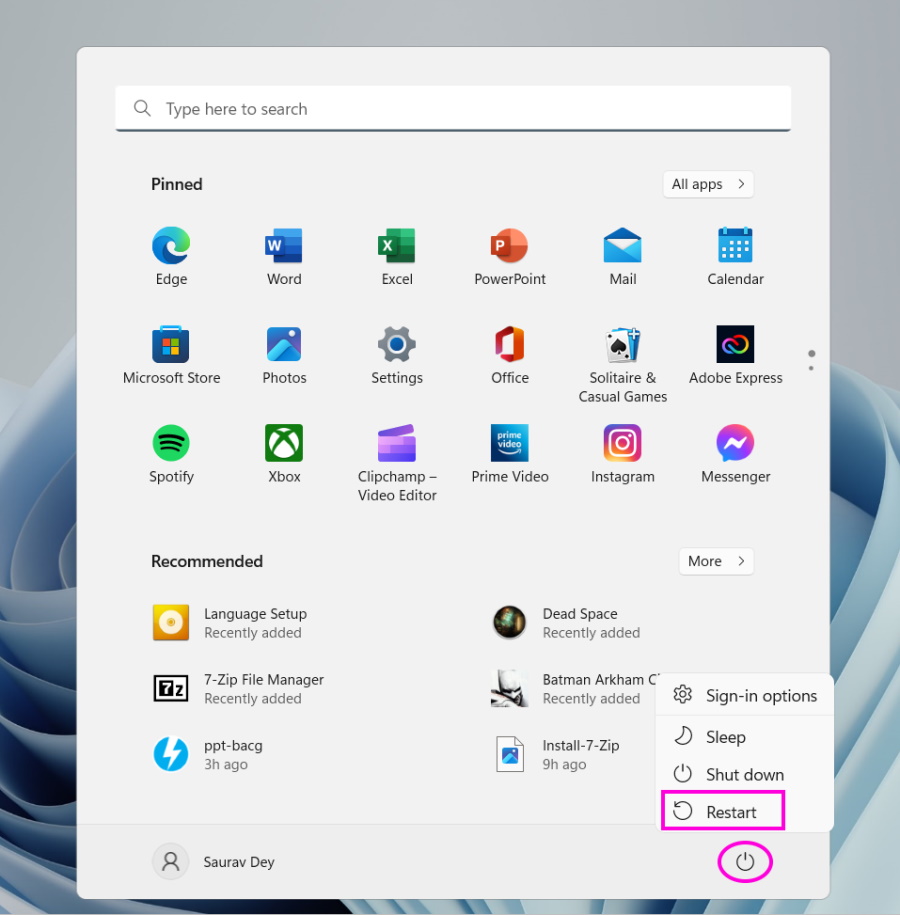
Whatever the issue with your computer, you should always start by restarting the computer. It is a simple but genuinely effective trick that works most of the time. So, go to the Start Menu and click the Restart option under the Power menu before jumping into the more complex troubleshooting steps.
2. Restart Windows Explorer
If the zip function is still not working on Windows 11, you may want to restart Windows Explorer. Restarting Windows Explorer is an effective means to handle bugs and issues on the Windows operating system. The users of Windows Insider programs often use this method clear out problems from their systems. Check out the following steps to restart Windows Explorer on a Windows 11 computer.
- Start by launching the Task Manager on Windows 11. You can press Ctrl + Shift + Esc or Alt + Ctrl + Del to launch Task Manager.
- Under the Processes tab, locate Windows Explorer.
- Select Windows Explorer and click the Restart task option at the top.
- If you are using an older version of the Task Manager, right-click Windows Explorer and select the same from the drop menu. Windows Explorer will restart, and after it restarts, the Zip function should start working again if it was caused due to malfunctioning Windows Explorer.
3. Make Sure the File is on an NTFS Drive
If the file you are trying to compress is over 4GB, you must use an NTFS partition. FAT32 isn’t capable of compressing a file that big. But it is also true; you don’t usually find a hard drive partition with a FAT32 format. However, USB drives carry FAT32 format, and if you are trying to compress the file directly from it, you should do the following.
- Press the Win + X keys on your keyboard to launch Windows Power Menu.
- Click the Disk Management option from the list.
- The Disk Management window comes with a list of various disk types or multiple drives. Check which drives carry the NTFS format.
- Move the file you want to compress to the C drive or any other NTFS drive. After that, you will be able to access and compress the file.
4. Default App Associations
The default app associations could be the reason behind the messed up zip function on your Windows 11 computer. So, you need to reset default app associations, and here are the steps for it.
- Press the Win + I keys on the keyboard to launch Windows Settings.
- Select Apps on the left side of the Settings window.
- Navigate to Default apps on the right side of the window.
- Scroll down to the Reset all default apps option and click the Reset button beside it.
- Lastly, click OK to confirm.
- After that, restart your computer and start using the zip function.
5. Run SFC and DISM Scan
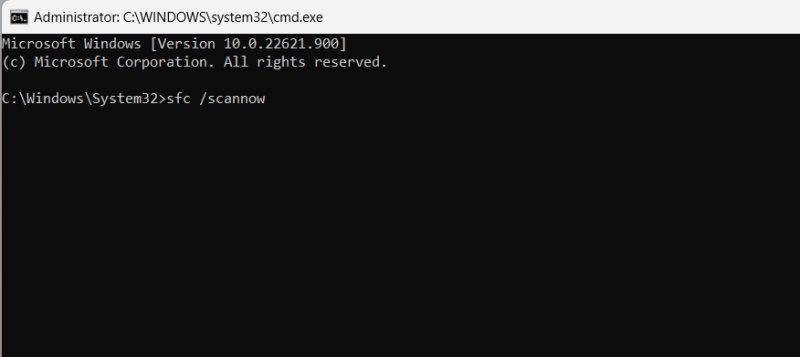
SFC stands for System File Checker, and DISM stands for Deployment Image Servicing and Management. These are helpful Windows features that fix problems. The SFC scan locates and repairs corrupted or missing files, while a DISM scan fixes issues with the Windows image. Running these commands will fix if the zip function is not working on Windows 11 due to missing files or broken Windows images. Check out the steps below.
- Press the Win + R keys on the keyboard to launch the RUN dialogue box.
- Type CMD in the box and press Ctrl + Shift + Enter keys to launch Command Prompt with administrator rights.
- After that, type the following command and hit Enter. Once SFC scan completes, you need to run the following DISM commands.
- Type the following DISM commands in the command prompt and press Enter to execute.
- After executing those commands, close the cmd window. Restart your computer and try using the zip function again.
6. Run the Disk Checker
If the zip function is still not working on Windows 11, run the Disk checker. The Disk Checker command helps to locate and fix disk errors. here are the steps.
- Press the Win + R keys to launch the RUN dialogue box.
- Type cmd and press Ctrl + Shift + Enter to launch it administrator privilege.
- After that, type or paste the following command and hit Enter.
- Repeat the command for the other drives on your computer. Replace “c” with other drive letters.
- Restart the computer once the process is complete.
7. Repair the Zip File
If you can’t access or unzip a specific Zip file, the file is likely to be corrupted. So, try to repair the file; you may have a chance to access it after the repair is complete.
- Open File Explorer on your computer and navigate to the Zip file.
- Copy the file address.
- After that, click the Start menu and type “command prompt.”
- Click the Run as Administrator option on the right side.
- Type or paste the following command in the Command Prompt window. The “path of the zip file” should be replaced with the file address you copied earlier. Hit Enter afterward.
- After that, type the following command and hit Enter.
Of course, you have to replace “name of the file” with the actual name of the Zip file. After executing the two commands, you may have to wait a while as WinZip repairs the Zip file for you.
8. Disable And Re-enable ZIP Support
You can also fix the Zip function not Working by disabling and enabling Zip support on your computer. It is a delicate procedure that you have to do using the Windows Registry Editor. basically, you will be registering the zip service on your computer again, eliminating corrupted files, bad services, and other issues.
- Launch the RUN dialogue box and type regedit. Hit Enter to open Windows Registry Editor.
- Click the File option on top of the registry editor window.
- Select Export from the drop menu to back up the registry editor values.
- Choose a location, provide a folder name, and select All under Export Range.
- Click Save to save the file.
- After that, navigate to – HKEY_CLASSES_ROOT\CLSID in the registry editor.
- Press Ctrl + F to search the registry editor for the necessary values. Uncheck the Values and Data boxes after the dialogue box appears.
- In the Find What box, type – {E88DCCE0-B7B3-11d1-A9F0-00AA0060FA31}.
- Click Find Next to proceed.
- Use the path — HKEY_CLASSES_ROOT\CLSID{E88DCCE0-B7B3-11d1-A9F0-00AA0060FA31} to verify the key. There should be a single value available here.
- If the paths are similar, press Delete.
- Click Yes to confirm.
- Press Ctrl + F again and uncheck the boxes for Values and Data.
- Type – {0CD7A5C0-9F37-11CE-AE65-08002B2E1262} in the Find What box.
- Click Find Next to locate the value.
- Once the value is located, verify the key by checking the path. It should be – HKEY_CLASSES_ROOTCLSID{0CD7A5C0-9F37-11CE-AE65-08002B2E1262}. If the path does not match, you have to do it manually.
- Again, press Delete and click Yes to confirm your choice.
- Now, close the registry editor and restart your computer. After the computer restarts, go to the saved backup. Double-click the backup file and click Yes when prompted to merge values.
- The backup is restored. You have to restart the computer once again.
9. Use a Different Client
The default compressing tool on Windows 11 has a size limit that can cause problems from time to time; if you can’t fix the ZIP function not working on Windows 11 using previous methods, it is best to move on to third-party tools such as WinZip or 7z.
- Download 7-Zip from the official website on your computer.
- After that, double-click the 7z2201-x64 to launch the installer.
- Click the Install button to initiate the installation of the 7-Zip application. After completing the installation, try compressing the files again using 7-Zip. You shouldn’t have any problems.
10. Uninstall and Install the Compression Client
If you use a third-party compression tool such as 7-Zip, which has stopped working, you may want to uninstall this application to fix the problem. Even third-party tools can stop working occasionally. So, it would be best if you were prepared, and the following steps will help you.
- Press the Win +R keys on the keyboard to launch the RUN dialogue box.
- Type appwiz.cpl in the box and click on OK.
- A settings window will appear with all the installed apps listed.
- Scroll down and locate the 7-Zip app.
- Click the Uninstall button to remove the app from your computer.
- After completing the uninstall procedure successfully, you need to install the app again.
- So, follow the method we have discussed in the previous section. Download 7-Zip from the web.
- Double-click if you already have the installation file on your computer to start the setup.
- Lastly, click the Install button to initiate the installation.
Is It Possible to Open ZIP Files on Windows 11?
Yes, it is possible to open ZIP files on Windows 11. In order to access the files inside the ZIP folder, you must unzip the file first to decompress the contents. Older Windows versions didn’t have built-in support for the ZIP files, but Microsoft has added it to Windows 11.
Why Can’t I ZIP File on My Computer?
You may have an underlying issue stopping the ZIP function from working correctly. But it is likely that the file or files you are trying to compress already contains compressed data or may be encrypted. In such a case, you won’t be able to ZIP or compress the file.
Why is the Compressed ZIP Folder Being Denied?
There could be a few reasons behind the access denied error. You may not have ownership of the file, or you may not have the required permissions, or the file is encrypted.
Is There a Size Limit for ZIP?
No, there isn’t. More than 4 billion files and folders can be included in a ZIP file.
ZIP Function Fixed: ZIP and Unzip Files on Windows 11 with Ease
Zip is an essential archiving format used by almost everyone with a PC. We use it to store data in less space, allowing to safely transfer data and ensure everything is intact during the compression and decompression process. A sudden breakdown of the zip function can cause a higher magnitude of problems for many users, a problem that needs to be handled swiftly. Hopefully, the workarounds we have listed in the article were helpful, while you also have the option to take the easy way out by employing a third-party zipping tool.